


Hey Guys,
today I want to show you a little tutorial about the making of reinforced concrete. I use this method to make a little base. I know that real streets are not build in that way, but I like the finished result :). The next time I will build a little Cityfight scene for a small project then I will use the same technique for two walls.
What do you need for?
- brass wire (the bigger the wall the longer the brass wire)
- ceramic powder or some gypsum (I prever ceramic powder its stronger and harder than gypsum)
- a blister part or something flat with a little border
- a soldering iron
- a hammer and a calliper
- wooden glue
- fun and mood :D
1. First Step
Take your brass wire ( I used around one meter) and pull it through an fixed objekt (I used a lamp holder). After this you have to put the ends into a little drilling machine (drill with your hands you need too long, buuuut you can try it :))
Drill as long as you mean the right form is ready. The more you drill the tighter the spiral and harder your final spiral.


2. Second Step
Prepear your spirals in that form you want to have at the end. Than start with the soldering. Do start with the outer spirals and work to the middle. It's a little bit tricky don't hold the soldering iron too long on your spirals otherwise you will lose soldered parts at neighbour places again.
DO NOT USE GLUE FOR THE FIXATION ITS NOT STRONG ENOUGH FOR THE FIFTH STEP ;)


3. Third Step
The steel bars should be in the middle of the wall. For a little distance I bend the ends 90° and cut all to the same lenght. The longer these ends are the bigger your distance to the wall surface will be.

Put your spiralconstruct into your blisterform. The bigger the form the more you need from gypsum or ceramic powder. You should look to find a form not much bigger than your spiralonstruct.
Than mix your powder like in the powder instruction and fill it up. And now let it dry!


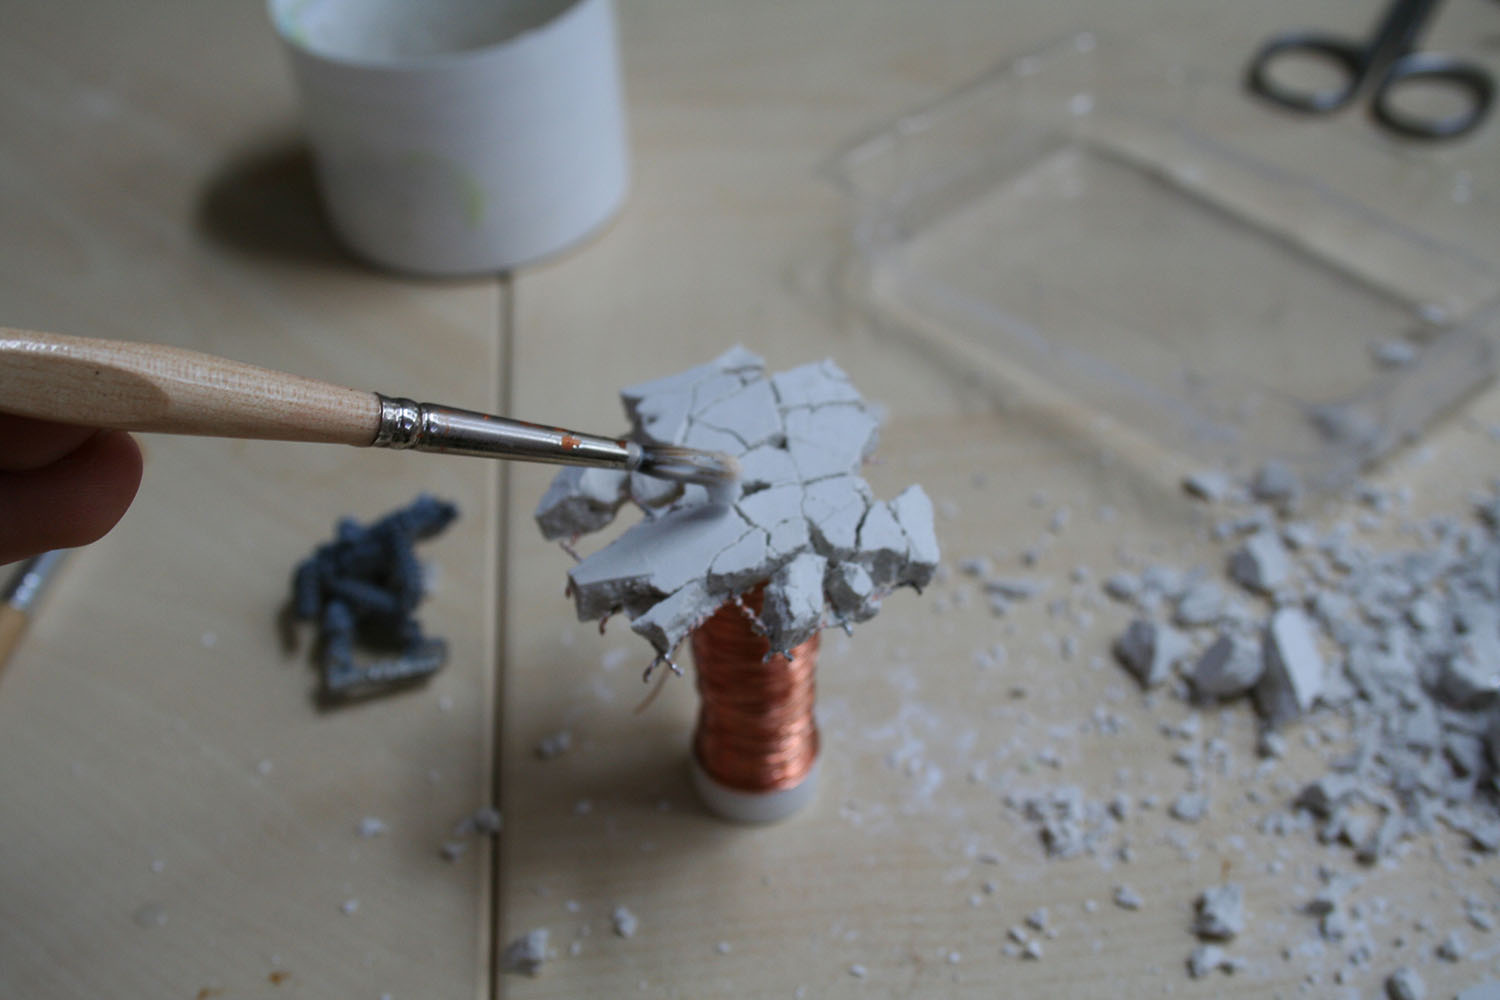
5. Fifth Step (brute force MUAHAHA)
Take the block out of the form and now hit it with a hammer. Show the block where the frogs have their hair curls ^^. You can use a calliper too to work on your damaged object.
You have to decide how damaged the final result would be. I want a heavily damaged street. I think a wall should be damaged only on the outer sides. But its your choise how much ceramic you hit or cut.


6. Sixth Step
Take some wooden glue and water 3/1 and fill up the whole construct with this mixture. So you get a realy strong finish.

FINISH
At the end I put my result on a base and put some small bricks from hammering with some glue on the base :)


This is the finish result with the Mini on top :D


I hope you enjoy the small Wednesday tutorial and maybe you can use it for one of your next project :D
Cheers Manu
Great idea, very cool effect. At the first opportunity I will try to use this method.
AntwortenLöschenThanks for sharing.
Coloured Dust
that's cool 8D Thanks !
AntwortenLöschenGreat, easy and mind-blowing effect :)
AntwortenLöschenglad you like it :D
AntwortenLöschenGreat tutorial. Thank you!
AntwortenLöschenFantastico tutorial
AntwortenLöschenVery nice Tutorial! Thanks for sharing!
AntwortenLöschenThis is *exactly* the tutorial I needed for a project I'm working on (ork warbike). Thanks so much!
AntwortenLöschen